Or, How to Sleep On Top of Your Vehicle for Just Over $100
We used to sleep in a tent. That was when we crossed the country in a big blue station wagon. Not long after getting a full-size van, the kids figured out we could all sleep inside the van instead of sleeping in a tent (yes, it was their idea, and they loved it!). It was fun, if a little crowded, and saved us many $$$ in camping and motel fees in the first trip alone. However, as the group size grew, we ran out of space. Just how many growing children and full-grown adults can you fit on the seats, on the floor, and so on of one van? (Answer – up to 10 – but we have other solutions, too.)
So, one very creative member of the group decided he could build us a contraption that would allow several people to sleep on the roof, rain or shine. A tent didn’t sound like a good idea; beyond the fact that it would have to be dried out after every rain (we didn’t miss the days of drying a tent – that’s for sure!), he was pretty sure the roof wouldn’t handle the weight very well.

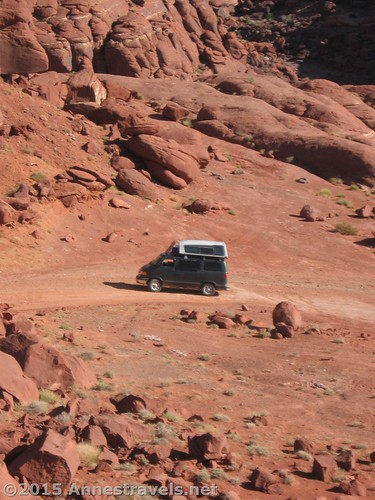
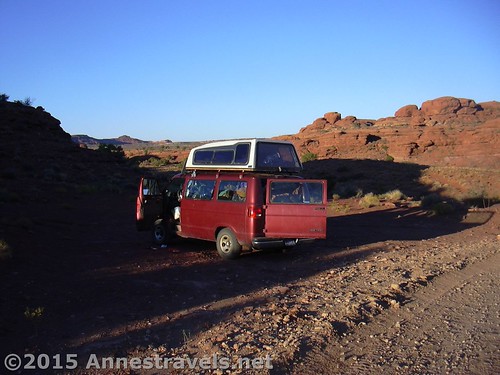
Morning at Anticline Overlook in Canyon Rims Recreation Area, Utah
After a lot of research (mostly focusing on the roof-top campers used by people in the Outback of Australia), he had a stroke of genius: why not buy a cheap truck cap, mount it on plywood, and then attach it to roof racks on top of the van?
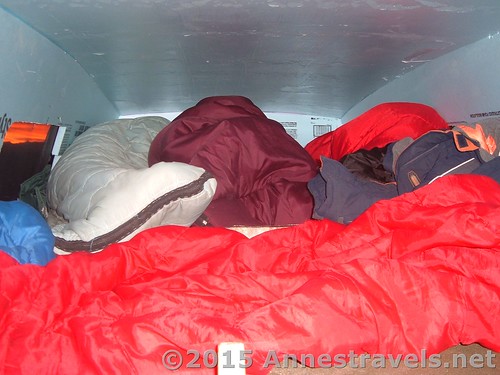
Inside the roof top camper…the sleepers are still inside their sleeping bags 🙂 This was in Big Bend NP, TX. BTW, the blue is hard foam insulation we fitted for the inside for winter trips. We cut holes for the windows, which is necessary for ventilation (you can see the sunrise through the hole).
It worked! And it cost a fraction of a professionally built hard sided roof top camper, not to mention the shipping cost to send it from Australia! Including all the hardware, etc., I think we paid $104 for everything on the first build.
Yes, there was a second build…he’d planned on a short-term solution (hopefully to get us through a couple years), but that was 2006. Since we’re still using it, we had to do a few major repairs on it once (since it wasn’t supposed to last this long, we added some better hardware, wood, etc., a couple years back).
So here it is…a DIY hard sided roof top camper…or as we’ve come to call it, our “roof top hotel”.
Materials for a DIY Hard Sided Roof Top Camper
Note: Before you get too far, you may want to weigh your materials and get roof racks that can handle the weight. We had some trouble finding roof racks – let alone affordable roof racks – that were made for more weight than a canoe. Also , you might want to check and make sure that your vehicle can handle the weight, as well.
1 used truck cap – ours measured about the width of the top of the van. We picked up ours at a local junkyard for about $50. Now, I’d pick one up on Craigslist for free or very little $.
½ thick plywood – cut to the size just slightly less than the size of the bottom of the truck cap. (You will likely end up needing more than once piece to cover the entire floor of the truck cap.)
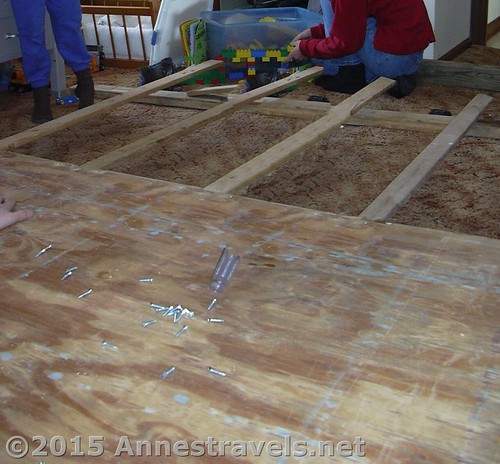
1 x 2 ½ in. furring strips – put around the outside of the pieces of plywood (on what would be the bottom of the hard sided roof top camper). Then put strips laterally along where you expect the roof racks to be (1 foot from each end and one in the very middle for us). Then put spacers between the lateral strips for structural soundness. (See the diagram – I haven’t explained it very well.) We used flat-head screws to attach the strips to the plywood.
We then coated the whole thing with water-repellent wood preservative.
Next, we placed the truck cap on top of the plywood base. We caulked between the cap and the plywood base using rope calk
to keep the water from coming in if it rained. It’s worked pretty well, although after the revisions it’s leaked a bit more so we’ve had to be more careful. Then screw it down with wood screws. (The reason for using wood screws rather than, say, carriage bolts was because we wanted to make as few holes as possible.) We put more rope calk around the outside at this point; this was perfectly waterproof the first time, at least. We always take rope calk with us so if something begins to leak, we can add more calk (which has worked better or worse depending on the situation). (Actually, our first rainstorm with the roof top hotel was in a torrential downpour in Oklahoma…although we’d hoped for a gentler rain to try it out, we figured if it could handle that, it could handle anything!)
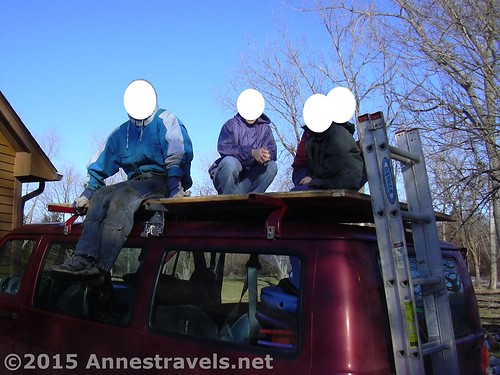
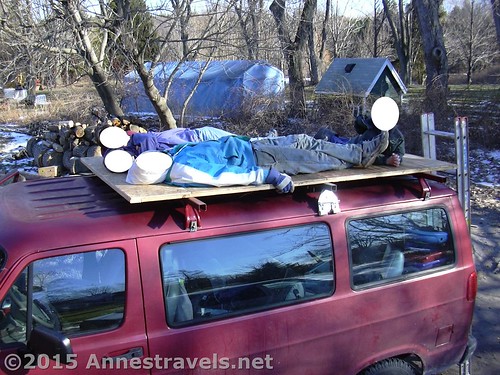
We connected our hard sided roof top camper to three roof racks – we made those, too, using some old hardware we had lying around – by attaching the roof racks to the plywood base about 1 foot from each end and the third on in the center, placing the roof racks where we’d placed the lateral furring strips mentioned above. We attached to the roof racks by using U-bolts around the roof racks going around the furring strips, up through the plywood base, and into the flange at the base of the cap. In the center, we used two carriage bolts from the top through the plywood base to attach to the roof rack. (You should be able to see some of this in the pictures.)
At this point, the truck cap was too heavy for us to lift onto the van. Even with a few strong guys around, we had major trouble lifting it high enough to get it onto the top of the van. We had originally thought we could take it apart and reassemble it on top, but that was going to be a bit complicated. For a few years, we’d build sand piles around the van to walk up to lift it, but again, that wasn’t a very good solution. Finally we purchased a winch – and that works great 🙂
We put a wind deflector in front of our hard sided roof top camper and found we saved about $0.03/gallon. We originally purchased one from a local RV store, but ended up extending it (using lauan plywood, then coating it with weather preservative) since it really wasn’t tall enough. We also tried to purchase a ladder for the back door so we could climb up, but since the ladder never arrived, we ended up using an old wooden ladder (just make sure it’s lightweight). The problem with this is finding someplace to stuff it at night when we’re sleeping in the cap (sometimes we can lay it across the top of the seats in the van or underneath the van, depending on where we are and how wet the ladder is – during the day, the ladder (and a lot of our camping gear) lives inside the cap).
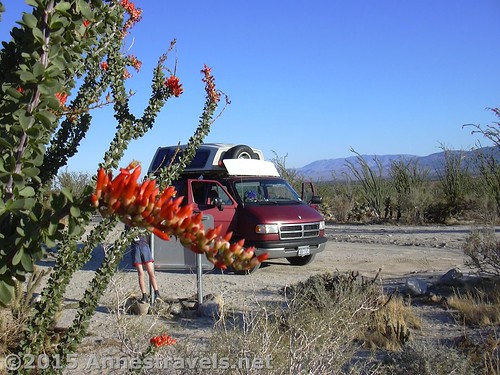
Our first wind deflector was a bit short – we used the spare tire for a spacer between the roof top camper and the deflector. We’re in Saguaro NP, BTW
If you use this post to make your own hard sided roof top camper, let me know! Just leave a message in the comments below and, if you can, include a link to some pictures of your creation also in the comment field (just don’t fill in the URL field or I won’t see it!)
Note: This is posted for your enjoyment and use; however, I cannot be held responsible for anything that happens while making, using, or in any other way associated with this tutorial or a roof top camper, even through negligence on my part or yours. Using this tutorial in part or in whole means that you agree that I am not liable.
This Week’s Featured Product!
Looking for even more inspiration? Check out this guide to outfitting your van or other vehicle for living on the road.

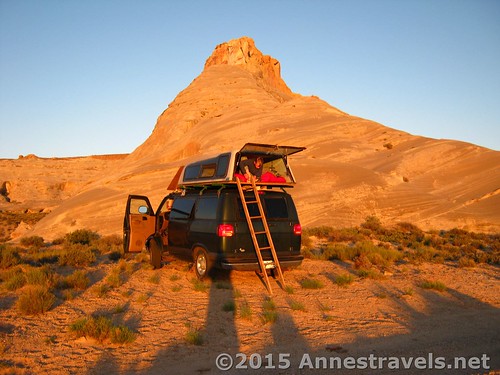
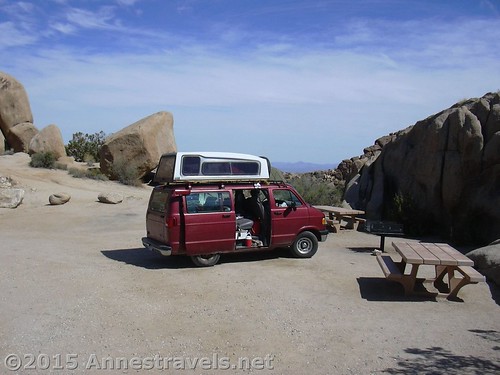




I found your site while looking for info on Grandview Lookout Tower. I have been to the highpoint of the Grand Canyon NP (N Rim, at Lookout Tower by entrance) and on the N Rim itself, on the S Rim itself, as well as the highest point on the entire N side, and S side (Grandview Lookout Tower).
I am very impressed with your site, and your travels w kids. Love the roof top camper !
Click on the National Park and National Monument Highpoints – each is a word in the middle of the page.
You folks will likely have been to the highest point of many NPs and NMs already. You should Log yourselves in to Peak Bagger dot com and see where you are at with those lists.
http://www.peakbagger.com/
http://www.peakbagger.com/list.aspx?lid=1821
http://www.peakbagger.com/list.aspx?lid=1827
Consider joining the Highpointers Club, a wonderful bunch of folks who visit each state highpoint.
http://highpointers.org/
Cheers!
Dave
Pingback: Anne's Travels » The Best of Anne's Travels in 2015
Pingback: Taking the Port Townsend Ferry - Fun Stuff - Anne's Travels