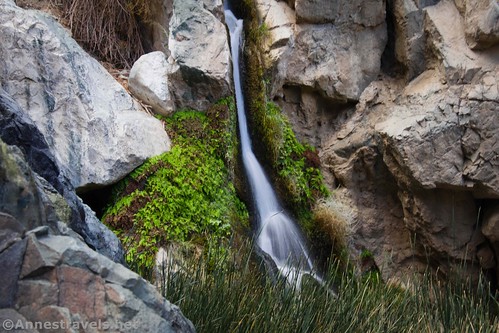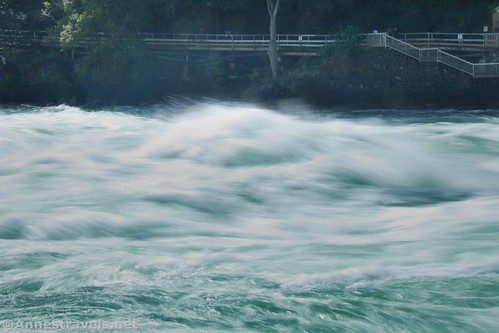
Have you ever seen a professional photo of a waterfall, complete with silky water, deep green leaves, and a sense of the water’s movement between dark banks? How about a swirl of foam at the bottom of the cascade, with dreamy rapids and an idyllic setting? While there are certain things that can only be provided by a nice waterfall setting (rapids and the dark area around the falls, for example) or with post-processing (hello overly green leaves!), most of the technicalities behind taking a dreamy waterfall photo are within the capabilities of many cameras, including smartphones (point-and-shoot cameras and some phones are a little harder, but I’ll include a section below on how to trick your camera into that silky, dreamy effect). You don’t even need any special equipment!

The optimal conditions for a silky, dreamy waterfall photo are:
1) A waterfall with some foam or whitewater (even streaks in the waterfall, itself)
2) A dark setting, such as a shadowed gorge or a cloudy day (I’ll talk about waterfall photography in the sunshine later)
3) A small whirlpool of foam or rapids below the falls is nice but certainly not necessary
The optimal gear for a silky, dreamy waterfall photo is:
1) A camera with the ability to manually change your shutter speed. Some phones (my Samsung, for example) have the ability to change the shutter speed in the “pro” settings in the camera.
2) It’s also useful if the camera has a delayed shutter feature, where you can set the camera to take the picture 2 seconds (or more) after you push the shutter button.
3) A tripod. It’s not a necessity, and since I rarely have one with me, a stable rock or log or very steady hands can often be substituted.

Set Up for a Silky, Dreamy Waterfall Photo
Position your camera with a good view of the waterfall (whatever composition you like). Set up the camera so it’s either firmly and safely on a tripod, a rock, a log or other firm surface. You can hand-hold the camera, but I find that it only works for pictures with a shutter speed of less than about 1/8 second.
Set your settings to focus on the waterfall (autofocus is usually fine) and the shutter speed to 1/32 or slower (usually 1/15-1/4 is long enough; you may need to play with your settings, especially if you’re including a whirlpool in the picture). Shutter speed priority mode on a bridge camera or DSLR is very useful in this situation, as you can set the shutter speed, but the camera automatically chooses the rest of the settings for a pleasing exposure.
You may also want to delay the shutter by 2 seconds or so – this will allow you to get your hands off of the camera before it opens the shutter (in case you bump or move the camera slightly while taking your hands off of it).

Taking a Silky, Dreamy Waterfall Photo
Take one last look to make sure you like your composition, then press the shutter button (take the picture). Voilà! A waterfall photo!

Tips, Tricks, and Trouble Shooting Your Photo
- If your water isn’t silky, you probably need a longer shutter speed. It’s also possible that there isn’t enough whitewater or definition to make a silky effect.
- If your water is entirely white, either there is too much whitewater in the waterfall for your taste or else you need a shorter shutter speed.
- If the photo is washed out, it’s because the shutter speed is too long – in other words, the long shutter speed is letting too much light into the camera. You can compensate for this by dialing the ISO as low as possible (for example, ISO-100), using a higher number f-stop (for example, f/22), or screwing one or more ND filters onto your lens. (I like Neewer, but there are many good brands out there – just be sure to get the size that fits your lens.)
- A longer shutter speed is not always better. Besides diminishing returns, a long shutter speed means more blur and a greater possibility of other things in the frame moving (blowing leaves or a squirrel running through the frame, for example).
- If your camera doesn’t have manual shutter speed, you can still trick the camera into a longer shutter speed. First, set whatever manual controls you do have – lower the ISO as far as possible (likely ISO-100) and/or raise the number of the aperture as high as possible. Second, take a picture of the waterfall when it’s fairly gloomy out – either on a heavily clouded day or at dusk or dawn. The camera will compensate for the lack of light by using a longer shutter speed.
- If there is simply too much light to make a silky photo (it happens), use the light to your best advantage. Use a very short shutter speed to freeze water droplets or choose an interesting composition that shows the waterfall in full sun.
- If other things in the picture are blurry, it’s either because they’re moving (wind in the trees, for example) or because the camera is moving (your hands are shaking, the tripod is shaking, etc.) Try putting the camera on a steadier surface, shorten the shutter speed, or minimize whatever movement is in the frame of the photo.

Fun Things to Try
- Want people in your dreamy shots? Dial back the shutter speed as far as possible while still getting the silky effect. Then ask your subjects to stand still and keep smiling.
- While editing the photos, unlike most scenery shots, waterfall pictures don’t benefit from massive amounts of contrast. The extra contrast makes the white whiter, often overexposing the highlights in the waterfall. Try playing with the saturation or chromaticity for more vivid colors, or add more shadows for a bit more contrast.
- The silky effect on waterfalls is fun, but it also works on rivers, creeks, water fountains, waves, and anything else that “flows.” Have fun making your water move in your pictures!
- Of course, the opposite of making water move is to freeze its motion. This is done by setting your shutter speed very short. I like to freeze splashes of water in midair, capture drops of water flying off a waterfall, catch the motion mid-fall of a cascade, stop a wave halfway crashing onto the shore… the possibilities are endless!

Today’s Featured Product!
Want to learn more about photographing waterfalls? This guide is packed with information, tips, and more! Buy your copy here.


